
NEW · LUMI STUDIO 2.0
A new dimension in test development
Lumi Studio Software 2.0
From cassette to digital result
Lumi Studio Software 2.0 is the all-in-one software for developing quantitative lateral flow tests on our camera-based readers Lumi Flex and Lumi Go – from image capture to a ready-to-scan method barcode.
WHY LUMI STUDIO
Turn lateral flow tests into precise, quantifiable data
Built for assay developers and lab professionals who expect valid, reproducible results. Software-based evaluation replaces subjective visual reading and bridges the gap between classic chemistry and digital precision.
01
Faster development
One software and one guided workflow from hardware set-up to validation measurement accelerate the development of next-generation assays.
02
Lower costs
Recalculate raw data with different settings instead of repeating experiments – and optimise methods in software.
03
Objective results
Image processing and peak evaluation deliver reproducible, quantitative data – no more interpretation by eye.
LUMI FLEX SYSTEM
Your path to digital measurement
Six clearly structured phases take you from the physical cassette to a validated method on the reader.

Connect reader and PC

Teach the reader to “see”

Interpret the curves

Provide the method

Measure on the reader

Review and optimise
Closed loop: measurement data from Phase 6 flows back into method development (Phase 3) for continuous optimisation.
ALL IN ONE
One software. The complete workflow.
No more switching between separate programs: image analysis, method development, barcode export and data analysis are now combined in Lumi Studio 2.0 – with one interface and one project for your entire assay.
| In Lumi Studio 2.0 | What you do | Result |
|---|---|---|
| Connect | Set up the connection between PC and reader | Stable communication with the reader |
| Image analysis | Image capture, illumination choice and ROI capping | Image processing parameters |
| Method development | Peak evaluation, calibration and result calculation | Complete test method |
| Export | Bundle all parameters into a barcode | PDF barcode card |
| Data analysis | Import and re-analyse measurement data from the reader | Optimised, validated methods |
PHASE 1 · LUMI STUDIO 2.0
Hardware set-up
The foundation for communication: connect the Lumi Flex reader to your PC and establish a stable channel.
- Connect via LAN or network-to-USB adapter
- Assign static IP addresses to reader and PC in the same subnet
- Enter host IP and port in Lumi Studio
- Activate “Studio Connection” on the reader
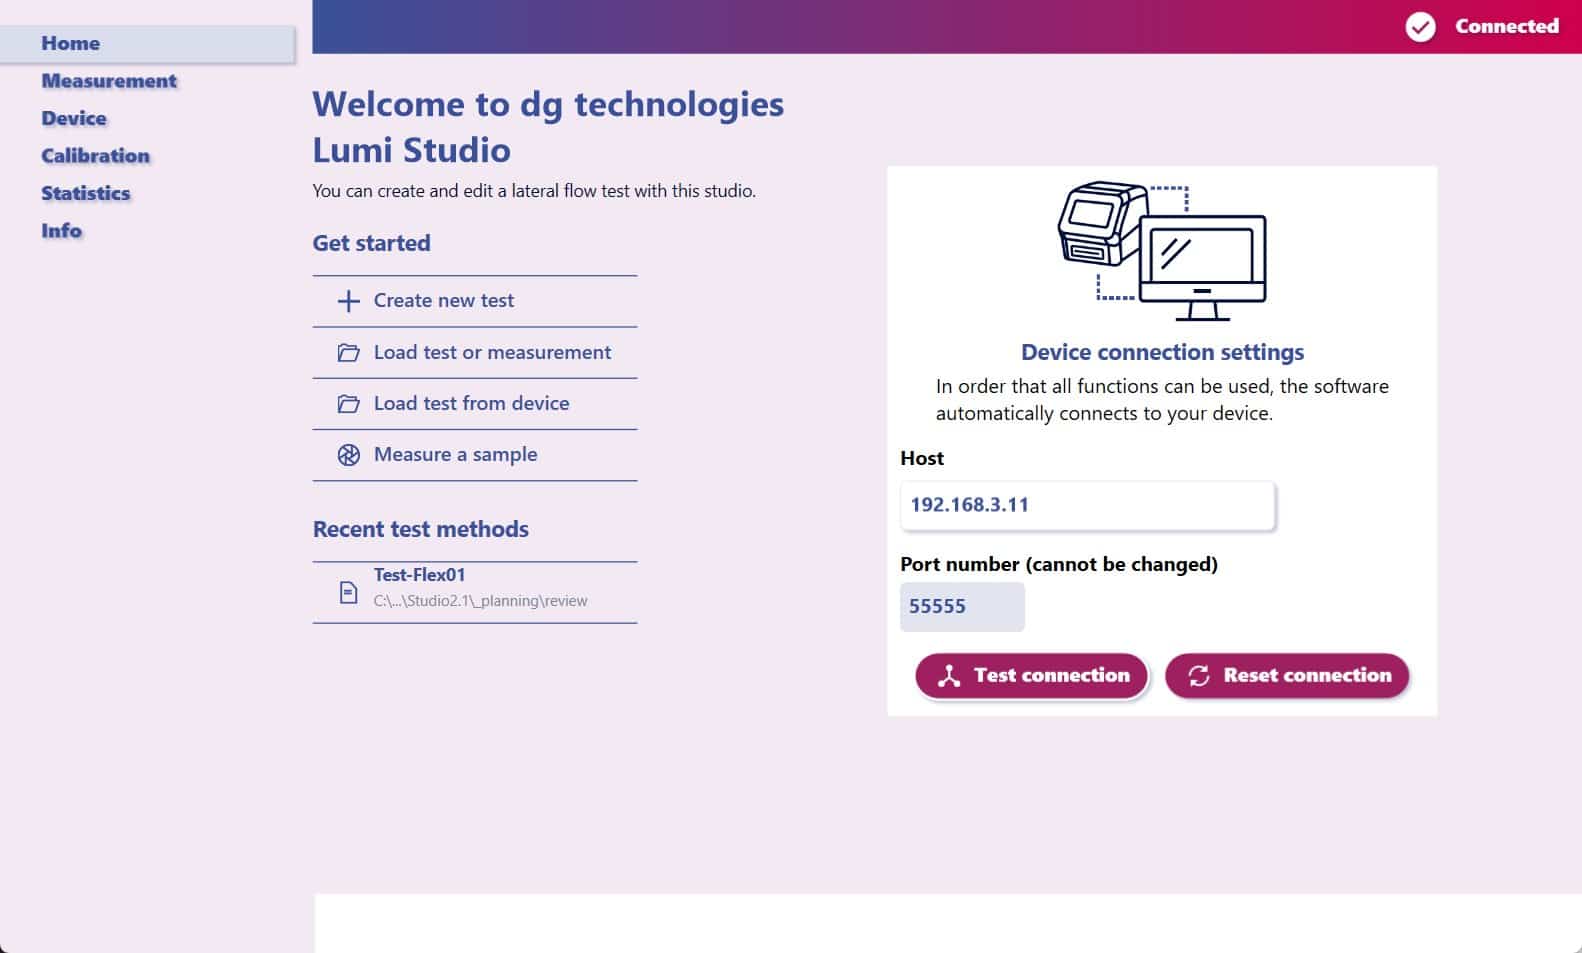
Home screen: get started and connect to the reader
PHASE 2 · LUMI STUDIO 2.0
Image analysis
Teach the reader to “see”: turn raw pictures into quantifiable data in three easy steps.
- Choose the LED illumination (red, green or blue) that gives maximum contrast for your test lines
- Improve image quality with multiple exposures
- Find cassette – define the outer cassette dimensions so the object is recognised automatically
- ROI & capping – frame the test area and mask the cassette edges to exclude shadows and optical artefacts
- Peak profile – extract a 2D intensity profile as the basis for method development
PHASE 3 · LUMI STUDIO 2.0
Method development
Interpret and understand the curves – the decisive phase for the precision of your analytics. Each test line can be processed independently.
- Define control and test lines with exact position and tolerance
- Fine-tune noise suppression to detect even very small peaks reliably
- Calibrate via manual input or standard samples – during measurement or in post-processing
- Compare batches with mean values and curve overlays
- Set result ranges and thresholds, e.g. automatic “invalid” if the control line is too weak
Evaluation algorithms: Peak Height · Peak Area · Absolute Height · Average
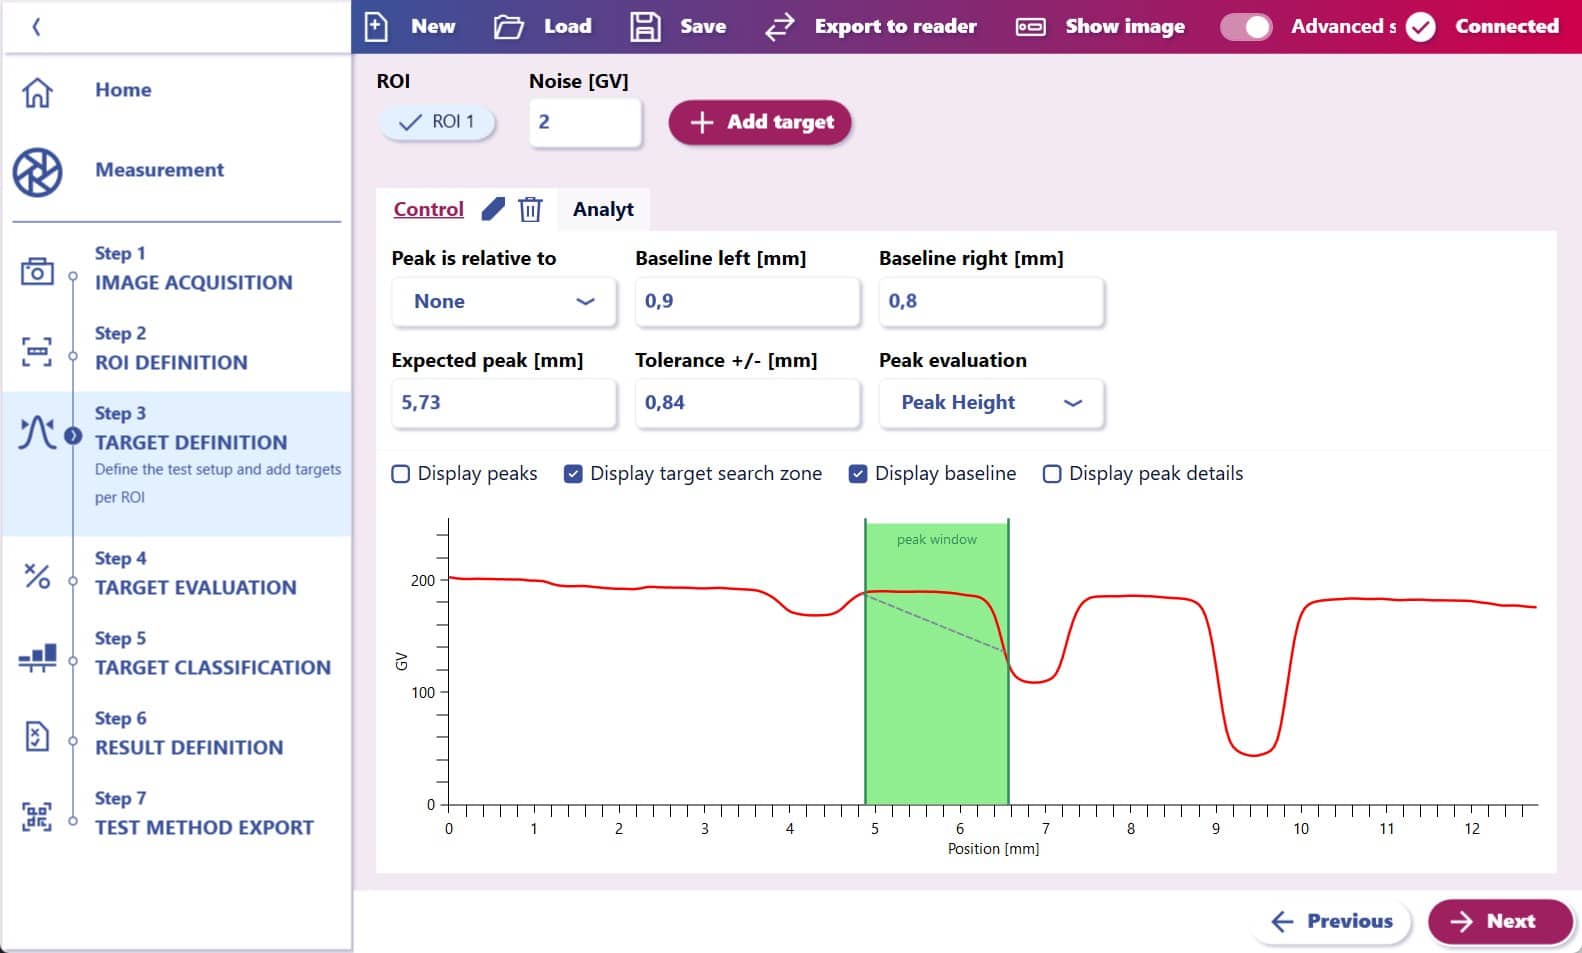
Step 3: target definition on the intensity profile
PHASE 4 · LUMI STUDIO 2.0
Export
Method deployment: bundle all image processing and analysis parameters into one barcode.
- Image processing and analysis parameters are taken over directly from your project
- Choose a barcode for the test method card or a small barcode for the cassette itself
- Optionally add lot ID and expiry date
- Create and print the PDF barcode card
Print the barcode card at 100 % (actual size) – any scaling prevents the reader from capturing it.
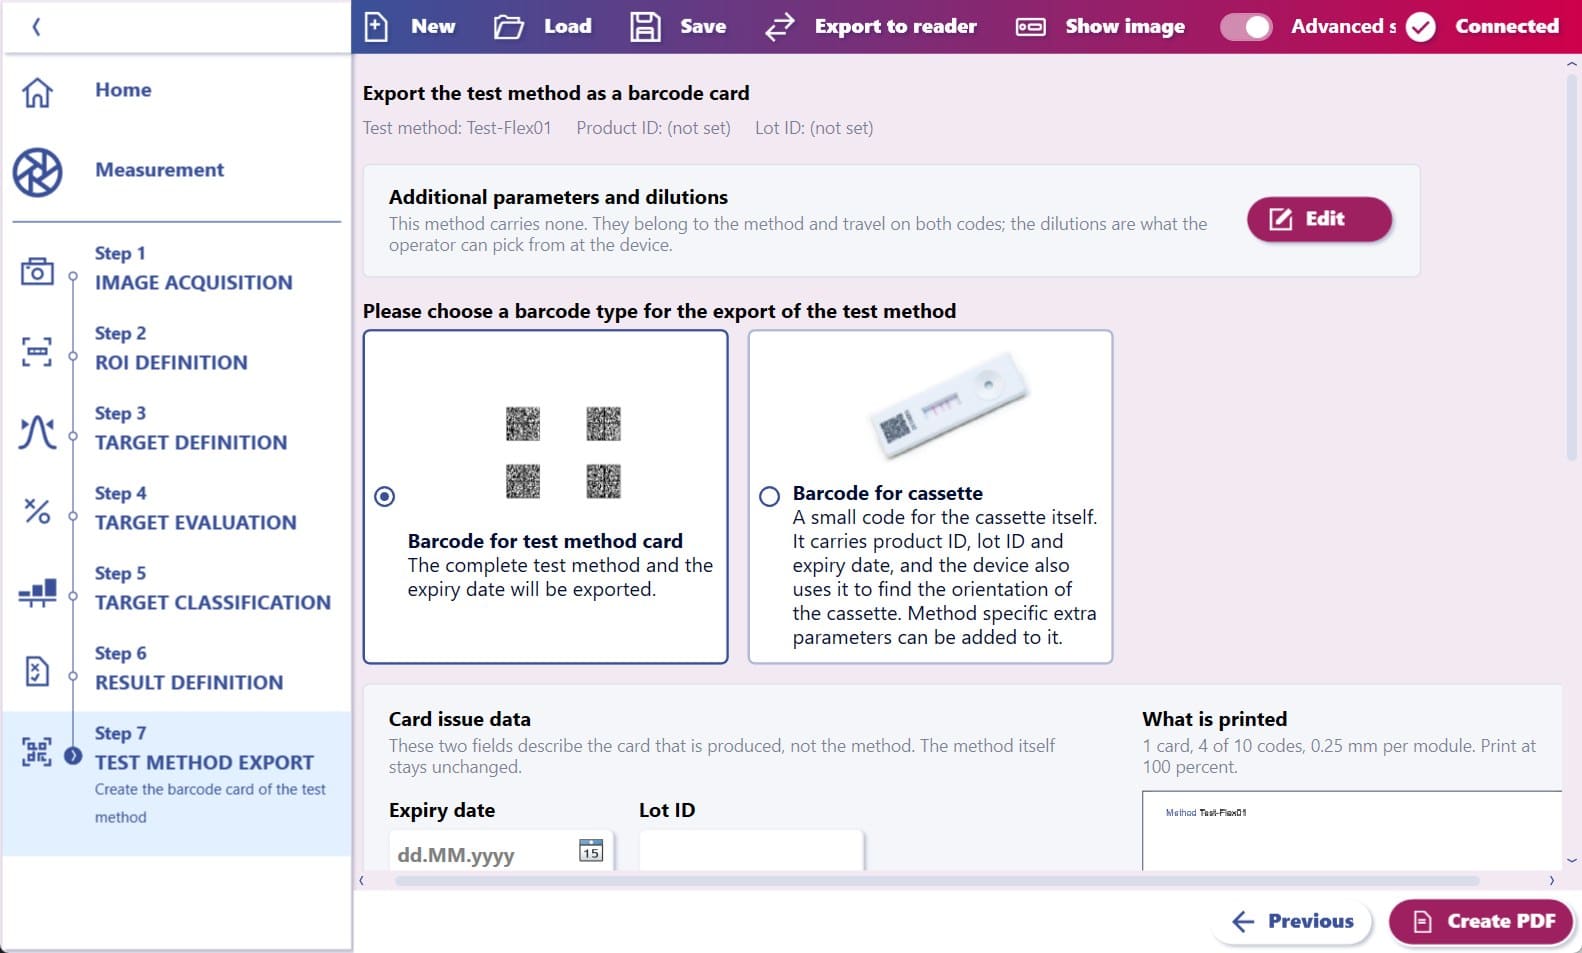
Step 7: export as barcode card or cassette barcode
PHASE 5 · LUMI FLEX READER
Measurement & application
From lab to field: scan the barcode and the reader loads the complete method.
- Scan the barcode card – the method is loaded including all parameters
- Insert the test cassette
- Start the measurement
- Automatic position correction by the reader
PHASE 6 · LUMI STUDIO 2.0
Data analysis
Understand your measurements – with full access to the original data for quality assurance, documentation and further development.
- Export measurement data from the reader to a USB stick
- Import them directly into Lumi Studio – decryption and conversion happen automatically
- Re-analyse images, intensity profiles and results
- Optimise methods and validate results
SUPPORT & NEXT STEPS
Resources for your development
Training
Step-by-step tutorials on Lumi Studio 2.0 – from peak optimisation to barcode export.